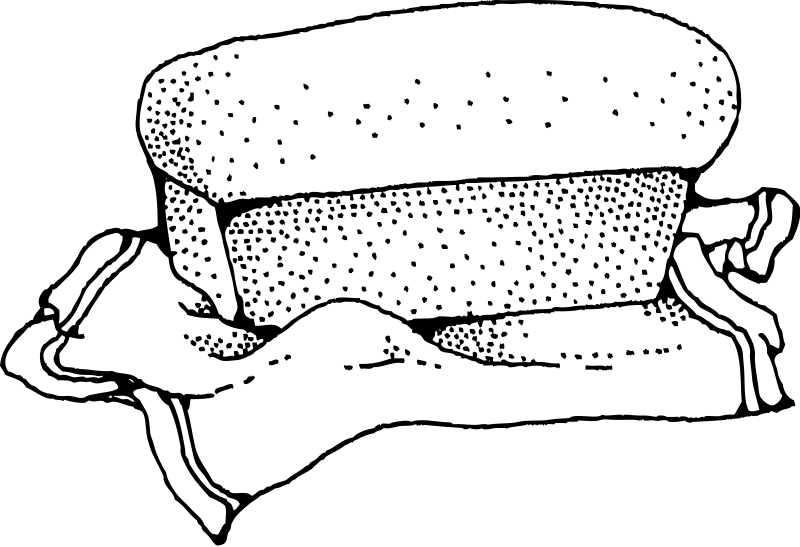
Bread Making
The Housewife
SECRETS FOR MAKING GOOD BREAD.
Great Southern Herald
7 March 1925 – P3
Three things are responsible for the differences found in bread made from the same recipe. These lie in the methods of handling the dough in the conditions under which the bread is allowed to rise, and in the oven in which the bread is baked, including the time and temperature of baking it.
It is obvious then, that, although a good recipe is important in bread baking, it is less important to the final result than the handling of the dough. The housekeeper must have a knowledge of how to handle dough. She must be able to recognise the indications of proper rising, and she must acquire the skill that comes only with practice.
Of first importance is the choice of flour to be used in making bread. A cheap grade of flour produces a poor loaf of bread, unless the dough is handled with great skill. After having learned to handle white bread successfully, a beginning may be made with whole wheat, by substituting part, whole-wheat flour for white flour. At first, half and half is enough, until the difference in handling the two kinds of bread becomes familiar, for wholemeal doughs are apt to be stickier than while flour doughs. After experience is gained, up to four-fifths wholemeal flour and one-fifth white flour may be used.
Next to flour in importance is the kind and quality of yeast used. Compressed yeast in fresh condition is now available to many thousands of home bakers who, a few years ago were unable to get it. Because the yeast plants in compressed wheat are in an active condition bread can be made much more quickly with compressed yeast than with dry yeast. Bread made in a few hours is, at times, less likely to be exposed to changes in temperature, and can be watched more carefully than when the process is slow. For these reasons compressed yeast is used by commercial bakers and by many home bakers.
However, excellent bread can be made with dry yeast, and some of the best home-made bread found is made with potato yeast developed from dry yeast cakes. Large amounts of yeast may be used to hasten the time of making bread and to increase its nutritional value. As much as six cakes of compressed yeast may be used to a loaf without affecting its quality. Compressed yeast should he soaked in one-half cup of lukewarm water with one-half teaspoon of sugar. Sugar is a yeast food and stimulates the activity of the yeast.
Dry yeast may be soaked in a cup of potato water – that is water in which potatoes have been boiled – to which one teaspoon or sugar has been added. If this is started at noon, the yeast will, by evening, be about as active as an equal amount of compressed yeast. If this dry yeast mixture is used, the remainder of the liquid necessary may well be milk, scalded and cooled as directed.
Milk in some form, because of its food value, is ordinarily the best liquid to use in bread making. Potato water, whey, buttermilk or water may be used. If milk butter, milk or whey are used, they should always be scalded and cooled to lukewarm (about 80 deg. Far. before the yeast is added. This is done to destroy any organisms which might compete with the yeast plant in the bread making process.
The housekeeper must remember, however, that yeast grows best in a lukewarm environment and that the liquid must not be hot. Excellent bread can be made by using buttermilk. Two tablespoons of buttermilk should be placed in the measuring cup and the cup filled with water. This Is then beaten well with an eggbeater, and one-fourth teaspoon of soda added.
The buttermilk is then scalded and used as is sweet milk in bread making. If the family is unable to get fresh milk, the home baker may well get a goodly allowance of milk into the diet by using condensed, evaporated or powdered milk in generous amounts in bread. When condensed milk is substituted for fluid milk or water one-half cup less of flour is needed than called for in the basic recipe.
Sugar in bread may vary from as little as one teaspoon to as much as one half cup to each loaf of bread. More sugar in bread produces a loaf with a bright brown crust, and a sweet flavour. With either the maximum or minimum amount of sugar, the dough rises slowly.
Shortening a bread may vary from no shortening to one-half cup for each loaf. A large proportion of fat retards the rising process. Fat makes the crust shorter, but still makes an excellent loaf of bread.
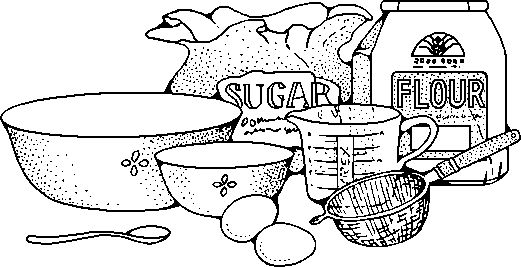
BASIC RECIPE FOR TWO LOAVES.
Ingredients.
1 cake compressed yeast softened in quarter cup lukewarm water, to which half teaspoon of sugar has been added, 2 tablespoons sugar, 2 tablespoons fat, 2 tablespoons salt, 2 1/2 cups fluid milk, 8 cups wheat flour.
Directions for Making.
Dissolve the Yeast – Measure one fourth cup of lukewarm water and add one teaspoon of sugar and one cake of compressed yeast.
Scald the Milk. – Measure two cups of milk and place them on the stove to scald.
Add Sugar and Fat. – Measure into a large mixing bowl two tablespoons of sugar, two tablespoons of fat and two teaspoons of salt.
Cool the Liquid. – Pour the scalded milk over the sugar, fat and salt, and cool them until lukewarm.
Measure the Flour. – While the liquid is cooling sift and measure eight standard cups, or two quarts of flour. (Although this amount of flour is about right it may vary up to a half cup, more or less).
Add the Yeast. – As soon as the milk is lukewarm add the yeast, softened in water, after stirring it well. The milk should be sufficiently cooled so that it feels neither warm nor cold.
Add the Flour. – Add to the liquid mixture six cups of flour and stir until it is possible to handle the dough with floured hands on a breadboard which has been well-floured. Remove all dough from the bowl. A long, flexible spatula is excellent for the purpose.
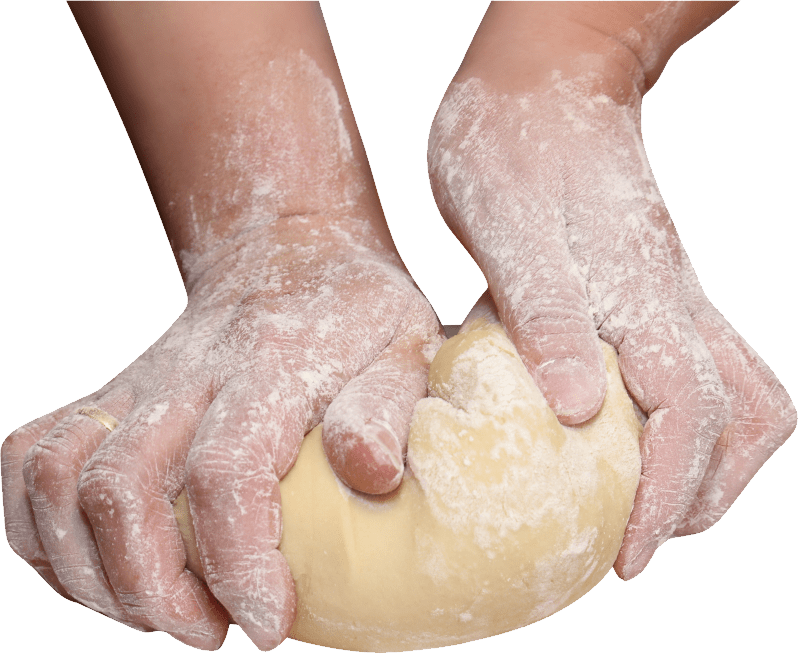
Knead the Dough. – Knead the dough until it is smooth and elastic, adding enough flour to keep the dough from sticking to the board or hands. If the dough sticks let it stand three or four minutes before attempting to handle it further, and it will stiffen considerably. Knead until the dough is smooth, elastic, and no longer sticks to the board.
Prepare for Rising. – Rinse the bowl with lukewarm water and place tin dough in the wet bowl, first putting it into the bowl with the smooth side down and then turning it over so that the smooth side will be uppermost. In this way the dough is moistened, and a crust will not so quickly form over it during the rising. Cover the bowl with a clean towel.
Keep the Dough Warm. – Dough should rise at a temperature of about 80 degrees Fahrenheit. If it is difficult to keep the air in the room uniform in temperature, the bowl should be surrounded with warm water, kept constantly at a temperature of about 87 degrees Fahrenheit This can be done by adding more warm water from time to time. The time of rising will be about two hours and forty-five minutes if the dough is kept constantly at this temperature. Dough has risen or fermented sufficiently when it has a little more than doubled its bulk, has small bubbles under the surface, and will not spring back when pressed with the finger. If the dough begins to sink in the centre it has risen too much or had an insufficient amount of flour.
Re-knead and let Rise Again. – At this stage of bread making, the home baker often moulds the dough into loaves and puts it into the tins. This sacrifices the quality of the bread. The commercial baker has taught us that results will be better if the dough is kneaded a very little without using flour, returned to the bowl and permitted to rise again until about double in bulk. It should be kept warm, as directed for the first rising. If the amount of yeast is varied, the period of rising changes, increasing if less is used and decreasing if more is used.
Mould into Loaves. – The dough is now ready to shape into loaves and should be moulded on an unfloured board. The usual method used by the home baker consists in folding the edges of the dough under, gradually pressing the dough into an oblong shape, and placing it in a greased bread tin in a way that the crease is on the bottom of the pan.
The commercial baker, if he must mould dough into loaves by hand has a technique that the home baker may well imitate, for it ensures a well-shaped loaf which can be moulded quickly, once a little skill has been developed.
The technique consists of moulding the dough into a roll resembling a large jelly. The first few times it may seem slow and clumsy and the resulting product rough and poor in shape. Shape the dough into a round ball; then, keeping the smooth side next to the board, press it down with the palms of the hands and shape it into a long sheet about an inch in depth and wider in the centre than at the ends. Lift it at the ends and with a gentle flapping motion pull it into an oblong. When the shape is right, with the hands bring the dough from each end over one-halfway to the centre and seal the ends of it to the dough. Lightly shape the loaf, bringing the back edge forward so that it is like a jelly roll and just the length of the bread tin. Place it in the bread tin, smooth side on top, and with the long crease underneath, and grease the top of the dough with melted fat, if desired.
Proof the Dough. – The rising of the dough in the tin the baker calls proofing, and the quality of the bread is very dependent upon the temperature at which it rises in the tin and the amount the dough is allowed to develop in the tin. Many bakers permit the bread to rise at a somewhat higher temperature in the tin than during previous risings. The dough is ready to bake when it has about doubled in bulk.
Bake Carefully. – Much dough that might otherwise have made excellent bread is spoiled in the baking. Dough properly handled should spring or continue to rise the first ten minutes it is in the oven. The loaves go into the oven, therefore, before they are quite as large as they should be when baked. The inexperienced bread maker may make the mistake of waiting until the loaves are full size before putting them into the oven. This will result in an over-tight loaf, porous in texture, one that crumbles easily and has little flavour. If bread is not light enough it is apt to crack.
Cool Properly. – Loaves when taken from the oven should be removed from the tins at once and cooled quickly before they are wrapped or stored away. If the home baker prefers a soft, shiny crust, she may grease the loaves as soon as they come from the oven.